Using generics to constraint the max change rate in variables

I´ve posted this article to TheCodeProject which talks about using generics to constraint the maximum change rate of a variable.

It´s very simple, but a good introduction to generics. Might be useful for real-time applications or for anything where you want to constraint how many times a variable can change it´s value in a certain period of time, regardless of it´s type of course (that´s where generics come in).

It´s a beginners tutorial. Hope I´ve explained it well enough. Anyway, ask for any help you may need.

Cheers

Calendario Tórrido del Maligno

Dios, a pocas fallezo de la risa...

en este link tenéis una entrada en el blog del maligno que merece la pena leer. Él y sus secuaces han hecho un Calendario Tórrido que es la caña, y además con fines benéficos.

Como me ha parecido una idea cojonuda, a ver si os pasáis todos por ahí y colaboráis con 12 lereles que seguro podéis dejar de gastaros en una lotería, que por otra parte no os va a tocar.

Así podréis comprobar como David Salgado cada vez se parece más a Arnold Schwarzenegger (o como carajo se escriba).

Genial la idea Txema !

Crysis 3000 barrel explosion physics demo

Take the Separating Axis Theorem. Build a collision detection system based on it, with several primitives, like barrels, boxes, and all the stuff. Stick there a rigid body response module and a really really stable numerical integration algorithm.

Is it fun enough to try that monster with just a couple of barrels? I guess it´s not...

http://www.youtube.com/watch?v=YG5qDeWHNmk

A more detailed explanation:

http://www.youtube.com/watch?v=VaHS-y_mapQ&feature=related

Simax en AutoBild

Ha sido una semana muuuy liada, pero por fin tengo un momento para publicar esta entrada. Simax ha sido entrevistado y publicado en la revista AutoBild, nº 108.

Si te das prisa, todavía estas a tiempo de encontrarla en los quioscos... hasta mañana viernes, que sale el siguiente número!

Saludos!

Sinclair ZX Spectrum +2. Maravilloso... sniff....

El otro día rescaté de una caja un libro que me llenó de nostalgia.


Es el manual de usuario de un ordenador que todavía conservo y, en principio, debería funcionar. Lo tengo bien guardado, junto con un montón de cintas con juegos, y un buen paquete de revistas MicroHobby: publicación especializada en este hardware, editada por aquellos años y que yo nunca me perdía, a pesar de requerir gran parte de mi paga. He encontrado una web maravillosa que rinde un merecido tributo a esta revista: http://www.microhobby.org/Ahí podéis descargaros un montón de números en PDF. Muchas gracias !!!

En fín, que corría el año 1987, y por aquel entonces los MegaHerzios se escribían con cuatro decimales: 3.5469 Mhz era el poder brutal de esta máquina. Claro que debido al sistema de compartición de RAM entre el procesador y el sistema de vídeo, la frecuencia se veía reducida a 2.66 Mhz.

Y eso que esta era la versión pija del Spectrum, que originalmente tenía 48K. Básicamente, el 128K era un 48K tuneado. Llevaba el mismo procesador, el mítico Z80, pero con más RAM y puertos de comunicación para impresoras, joysticks y demás. La pera, vamos...

Pero... ¿quién necesitaba más? Al fin y al cabo, el Goody (Opera, 1987), el DynamiteDan (Mirrorsoft, 1985), el HeadOverHeels (Ocean, 1987), La Abadía del Crimen (Opera, 1988), funcionaban perfectamente... Qué nostalgia! Eran juegos maravillosos, la verdad... Aqui, la portada del Goody, versión Amstrad.


Y por cierto, no se si alguien se acuerda, pero los equipos de desarrollo españoles eran de los mejorcitos de nivel internacional: Opera, Topo, Zigurat, Dinamic...

Por aquel entonces, los juegos se hacían entre dos personas que no dormían ni comían hasta terminar el proyecto. Es el caso de Paco Menéndez y Juan Delcán, responsables de "La abadía del crimen". Por cierto, desde 2001 Paco Giner se encarga de este remake para PC.

Desde que los juegos se convirtieron en una actividad muchimillonaria, los equipos de desarrollo Españoles fueron perdiendo la batalla contra los de otras nacionalidades, seguramente porque no fueron capaces de encontrar gente en España con la suficiente visión como para invertir su dinero en "hacer jueguecillos para los chavales".

Qué lastima que tanto talento se desperdiciara en este país... De momento, empresas como Pyro y compañía luchan por hacer resurgir la llamada "edad de oro del soft español", aunque obviamente, hoy en día es mucho más complicado.
Yo por mi parte, siempre trataré de aportar mi pequeño granito de arena. En fin... ánimo !


HTC Touch + GPS BlueTooth + tomtom6 for dummies

Si te preguntas como configurar tu HTC Touch con un receptor GPS BlueTooth para usar el navegador tomtom 6, sigue leyendo.
En este tutorial, voy a utilizar el siguiente receptor GPS:


Holux M-1200. 70 pavos aprox. en el MediaMarkt, aunque he visto gente en foros que lo ha pillado hasta por 40 en intesné.

Todavía no lo he probado en un viaje largo, pero por ahora parece que va de coña, y es muy pequeño. La semana que viene le dare chicha en Alemania, a ver cómo se porta...

En fín, al lío: Primer paso, enciende el Holux M-1200.

Segundo paso, abre el CommManager de tu HTC Touch y selecciona Configuración -> BlueTooth


Siguiente paso. Añadir un nuevo dispositivo BlueTooth y emparejarlo con tu HTC. En las fotos vais a ver que ya está añadido (lo siento, soy muy vago y me ha dado pereza quitarlo, aunque sean 20 segundos). Voy a hacer como si no, y voy a crearlo otra vez: Seleccionar la opción "Añadir nuevo dispositivo"


El HTC buscará dispositivos BlueTooth cerca y mostrará en una lista todos los que encuentre, entre ellos, el Holux.


Selecciona el Holux y pulsa en "Siguiente". Aparecerá la pantalla de configuración de la asociación, emparejamiento, o como te de la gana de llamarle. Como la siguiente:


En ella marca la opción "Puerto serie" y pulsa sobre "Finalizar".

Después, hay que cambiar un par de cositas en la configuración BlueTooth. Ve a la pestaña "Puertos" y pulsa sobre "Nuevo puerto saliente":


En la siguiente pantalla selecciona tu dispositivo (en este caso Holux M-1200) y pulsa en "Siguiente". Llegarás a una pantalla como esta:


En ella selecciona uno de los puertos COM de la lista y asegúrate de NO MARCAR la opción "Conexión segura".


Nota: Si no sabes qué puerto COM elegir, tienes dos opciones: probar uno a uno hasta que funciones, o usar un programita como el que trae el Holux M-1200: GPS MiniViewer, que tiene una opción para escanear todos los puertos diciéndote en cuales encuentra GPS y en cuales no.

Una vez seleccionado el puerto, pulsa en "Finalizar" y vuelve a la configuración BlueTooth, esta vez para ir a la pestaña "Seguridad":


Asegúrate de dejar la opción "Autenticación (llave maestra) requerida" DESMARCADA.

Pulsa en Ok, y ya está. El tomtom6 te debería reconocer el GPS.

Nota1: Ten en cuenta que a veces al tomtom le cuesta un rato reconocer el GPS

Nota2: Si el GPS que usas no es el del ejemplo, la configuración puede variar. Lo mejor es que mires bien en su manual, sobre todo las cosas relacionadas con seguridad, etc.

Nota3: Para usar el GPS bluetooth con el tomtom no es necesario que toques nada en la opción "External GPS" de la pantalla Inicio->Configuracion->System. Déjalo como está.


HTC Touch + HTC EndKey application

I recently installed the HTC EndKey application in my HTC Touch, and I must advise you not to do so, mainly due to:

1.- This app is not very useful for the Touch, as it only gives you quick shortcuts for funcs like: lock phone (the htc touch is lockable via a long press in the red button), vibration mode (easily accesible in the speaker config icon), airplane mode (it may be useful if you take a plane twice a day...)...

2.- It seems that there´s no single way in the hell to remove it, appart a hard reset. When you install it, the HTC Touch warns you about it, because its a WM5 app. That should be no problem, but when you try to uninstall it, an error occurs, and it´s not removed.

If anyone knows how to uninstall without doing a hard reset, please post it here...

Cheers !

Automatic Lightmap Generation for Generic Sets of Geometry in Real Time Simulation

Siguiendo en el baúl de los recuerdos. No encuentro link al pdf, pero éste es el título de un Short Paper que publiqué en el año 2002 junto a mis mentores Alex García Alonso y Luis Matey.

Fué la primera aproximación a la técnica desarrollada para atlas de coordenadas genéricos.

Seguiré buscando a ver si se puede bajar de algún sitio.

Hi !

Texturas precomputadas para aplicaciones en tiempo real

Hace ya algunos años, publiqué un artículo en colaboración con mis dos mentores (Dr. Luis Matey y Dr. Alex García Alonso), que llevaba el título:

APLICACIONES AVANZADAS DEL USO DE TEXTURAS
PRECOMPUTADAS EN ENTORNOS DE SIMULACIÓN EN TIEMPO
REAL
En la revista de ingeniería industrial de la Universidad de Bío Bío, en Chile.
En ese artículo se describía una propuesta diferente para generar lo que hoy se conoce como "Atlas de Coordenadas" de forma automática, para la aplicación de lightmaps y otras técnicas a mallas geométricas genéricas.
Os dejo aqui el link por si a alguien le apetece echarle un vistazo.
Saludos.

XBox360 Controller for Windows - PC

Last week, I bought an additional XBox360 controller. In this case, I bought the wired version, because I wanted to use it with my PC without the need for an additional wireless adapter.


I must say it works flawlessly on the PC. You just need a special driver found here.

You can use it with XNA as well, though now, with the XNA GameStudio 2.0, you can read many other controller types, not only the XBox gamepad.

Cheers!

XNA Image Reflector. Easily create web2.0-like reflected images

XNA is for games, but not just for games! ;)


I finally posted the XNAImageReflector article to TheCodeProject. It includes full source code, screenshots, instructions and programming details.


About XNAImageReflector:


It´s an application that integrates XNA rendering and maths with Windows Forms. and that lets you create images like this one in 5 seconds:


Hope you like it!

TheCodeProject article: XNA Billiards Visual Demo

Today, I have uploaded another article to TheCodeProject. You can find it here.


I paste here the introduction:

This article is an example of 3D rendering and content processing with XNA, and a good start for those you want to start learning XNA. Although it´s not a full working Billiards game (that will be another article), it can be a good starting point for one too.
It´s not intended to show the best way of doing anything, it´s just a quick example I´ve made in four or five ours. Any improvement is really welcome!
It covers the following topics:
  • Content processor development
  • Content exporting from 3DSMax, including Max shaders, ready to use with XNA
  • Content loading
  • 3D rendering, with and without Max Shaders
  • Basic camera development
  • Basic Sprite management
  • Basic custom user interface development
  • Mouse reading
  • Scene and 3d models management
  • Settings serialization with XML
  • Additional model properties implementation
Hope you like it.

Double Buffer Graphics in C# + GDI (II)

This happens sometimes to me.

As a C++ programmer, when I moved to .net I was not used to have things done there for me, so I tended to do everything on my own (I found myself once programming a method to search a substring inside a string... ;), and today it happened again.

Augusto Ruiz has left a comment in my last post about GDI DoubleBuffering that is worth to mention, because all the DoubleBuffer implementation I showed in the last post, can be overriden by a simple property of the control you are going to render in:

public class DoubleBufferedPanel : Panel
{
public DoubleBufferredPanel()
{
this.DoubleBuffered = true;
}
}

This property is inherited from Control, so any windows control has it, but is protected. Thats why you need to create a custom Panel, Button, or whatever you want to use as rendering target. Just change its value in the constructor and that´s it!

The previous implementation still has it´s advantages, like a full control on the rendering and presentation process, but for simple cases this way is muuuuuch simpler.

Can´t understand why a google on this topic shows CodeProject entries talking about a custom implementation like the previous one, and no one talks about this way. Probably because it´s too simple and everybody knows it... je je...

Great!

Better graphics in XBox360 than in PlayStation3 ?

Today, watching some videos in one of my favourite sites, I´ve found a comparison between Assassin´s Creed for XBox360 and PlayStation3.

Link: http://www.gametrailers.com/game/2581.html


It´s quite impressive to see that XBox360 beats the PS3 up in this game. Some people say it´s just a contrast or gamma adjustment issue, but I don´t think so. We must trust the GameTrailers people to be professional and to have made the comparison with the same adjustments.


In the XBox360 version there´s more detail and, to my eyes, there´s some cool HDR which doesn´t appear in the PS3 version (see picture above).


It´s true that consoles need some time to do their best, and the PS3 is much younger than the XBox, but for the same reason, it also has better hardware (in theory).


Who knows...

XNA Image Reflector. Easily create web 2.0 reflected images

In the last months or years, every single power point I see, with a decent design and look, includes pictures that have been "reflected" vertically, as if they where in the top of a reflecting table or so... it´s the so-called "web 2.0 reflection". Just like this one:


This kind of effect can be easily done with Photoshop or whatever, just reflecting the image and aplying a distort and a gradient mask, but hey! those 5 minutes per image are priceless! So I decided to make a small app that allows you to create this kind of effect in 5 seconds.

Probably there´s already something similar out there (see below), but I do it just for fun and to practice some new things I´m explaining below. I will upload the source code here or at TheCodeProject, so you all can check how it´s done.

Specs:
  • Automatic reflection using a reflection polygon to specify the shape of the form to reflect
  • Automatic reflection distortion
  • Automatic alpha gradient with different gradient modes
  • Image resizing and re-locating
  • Post-processing effects for reflection: Blur, Alpha Texture, ...
  • Supports following formats: BMP, JPEG, TGA, PNG, DDS, DIB, HDR, PPM, PFM

Technical info:

  • Developed in Visual C# Express
  • All the maths and graphics done with XNA
  • Shows integration between XNA and Windows Forms

An example:

1.- Take the original picture:


2.- Apply my XNAImageReflector: with blur post processing turned on

As you can see, the cool thing of all this stuff (appart from the post-proc effects) is that you can build a path that will define the shape of the reflection. Not just vertical or horizontal reflections, which are Ok for non-perspective objects, but that doesn´t work well on logos like this one.

3.- Save the final image:

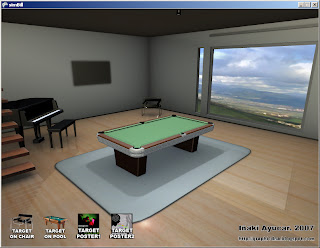
Other examples created with XNAImageReflector:


This one shows the Alpha Texture post processing effect too:

Similar projects and tutorials I´ve found:


Cheers!


XNA easy and efficient primitive rendering (PrimitiveBatch)

Recently, I got into the situation where I had to render a simple line in a 2D view, in XNA. As the fixed func. pipeline is no longer available, in order to do so you would have to deal with a shader. Probably a BasicEffect or another one created to render 2D lines.

I just googled up for "xna 2d rendering" and I´ve found this article in ZiggyWare (a must for any XNA developer). It shows how to do some basic collision detection between polygons, but as far as it also renders those polygons with lines, I was interested on it.

To draw all the lines there, he uses the PrimitiveBatch class, a very helpful class developed in one of the XNA samples available here, that I honestly didn´t take the time to look at. It behaves in a similar way as the SpriteBatch, basically:

batch.Begin( primitiveType );

batch.AddVertex( Vector2D);
...
batch.AddVertex( Vector2D);

batch.End();

And that´s it. Easy, ain´t it?

Cheers!

Tetris a.k.a "Cuadrados de Rusia"

Y es que así es como parece que conocen en China al Tetris.


Yo ya sabía que era un juego adictivo, porque me dejaba casi todas las monedas de 25 pelas que componían mi paga en la jodía maquinilla, pero es que esta noticia me ha dejado "pa'llá":


Una anciana china de 72 años, adicta a los vídeojuegos desde hace dos décadas

La colega (se llama Liu Zhi), que se inició en este aciago mundo con el Tetris, empieza a jugar a las 9 de la mañana y termina a las 10 de la noche, y si no la vigilan, se olvida hasta de comer.


No me quiero imaginar qué nivel de experiencia tendrá en el WOW ! Debe ser la portadora de la "espada de las mil verdades".


Juas !....

TechEd 2007. More C# 3 features. Object and collection initializers

Another great feature of C# version 3, shown in the TechEd today and yesterday is Object Initializers.

Working as expressions, we can create and initialize objects in a single statement. Imagine we have a class Provider, with properties Name and email. We can do the following:

Provider prv = new Provider() { Name="Microsoft", email = "microsoft@microsoft.com" }

That will create the object and initialize every property we include between the brackets.

In a very similar way work the Collection Initializers, where we can add new items to a collection in the same statement we create it:

List list = new List()
{
new Provider(),
new Provider(),
....
}

And those two features can be nested in the following way:

List list = new List()
{
new Provider() { Name="Microsoft", email = "microsoft@microsoft.com" },
new Provider() { Name="AMD", email = "amd@amd.com" },
....
}

Cheers!

TechEd 2007. .NET Language Integrated Query (LINQ)

The last session I attended on monday was:

The .NET Language Integrated Query (LINQ) Framework

by Luca Bolognese (Senior Program Manager, Microsoft).

For anyone thas has worked in data access components, software, or have struggled at anytime with databases, this represents a huge step forward in terms of productivity, robustness, understandability, and efficiency.

I´m no expert in such issues but, to my eyes, it´s just as if you could write SQL sentences right in the middle of your C# code, combined with the power of .net of course. In addition to that, LINQ can work against almost any kind of data source (SQL data bases, xml, arrays, collections, etc), and serve as well as a datasource for dataBinding.

An example:

[Assume "names" is a collection of strings, an array or whatever]

List<string> query = from s in names
where s.Length == 5
orderby s
select s.ToUpper();

The full LINQ sentence is evaluated as a single expression, but is executed in steps. First, every string in "names" is selected and returned to the second sentence. This one applies a filter selecting those with length == 5 and returns another collection, which is ordered in the third sentence. And so on... as complex as you may need.

I asked Luka how the debugger behaves in this sentences, and he said that LINQ sentences are watched in a special window which allows to see each step of the execution. This is something I´m definately waiting to try.

Just as a last note, LINQ doesn´t always behave this way, as this would be very inefficient. If the collection it´s parsing is just that, something that implements iEnumerable, it behaves so, parsing each element in the collection, iterating through the full array.

BUT, the interesting thing is: if the collection being parsed also implements iQueryable, it behaves differently, building a full query from the LINQ sentences and executing it, as once, at the end. This obviously would make debuggin more difficult, but is the efficient way to execute certain types of queries.

Cheers!

TechEd 2007. VStudio 2008, C# 3, Automatic Properties

Just following the previous post, I keep talking about the session by Daniel Moth (http://www.danielmoth.com/Blog ), yesterday in the TechEd.

He showed another C# 3 new feature that is extremely useful: Automatic Properties.

You not tired about writing something like this?

private int mNumCustomers;
public int NumCustomers
{
get{return mNumCustomers;}
set{mNumCustomers = value;}
}

This is a pain in the ass... You are supposed to use properties, to be clear, clean, robust, elegant, and a good christian, but writing them is painful. Yes, refactoring helped quite a bit, but it´s still something... don´t know... slow and uncomfortable.

Well, Microsoft says that is there to make us more productive, as there it is:

Automatic Properties a.k.a JustWriteThis:

public int NumCustomers{get; set;}

The language will take care of creating the private equivalent variable, just for us. We don´t need to write it. Just specify if you want the get and set, the get only, etc, and there it is!

Again, more productivity...

TechEd 2007. VisualStudio 2008, C# 3, MultiTargeting and Anonymous Types

Yesterday, from 16 to 17:15, Daniel Moth (http://www.danielmoth.com/Blog ) introduced the new features of VStudio 2008 and .Net Framework 3.5. It was a very impressive session, fun and interesting.

Specially exciting the new multi-targeting feature of VStudio 2008. It´s a way to tell the environment which .Net Framework version your project will target, through the project´s properties window. Just selecting in a comboBox if it targets version 2.0, 3.0, or 3.5. By selecting one of them, all of the version features are enabled or disabled for your project, and it´s possible to switch between them without loosing work. Your project will just adapt to that perfectly.

Just as a tip, VStudio 2008 finally has the option "Open folder in windows explorer" in the context menu of the solution explorer... Yeeeeeaaahhhh ! Cannot imagine why something that simple didn´t appear before. No more navigating to bin\debug folder....

Also found quite interesting some of the new C# 3 features, like anonymous types. Didn´t you find redundant something like this before?

Form f = new Form();

Why do I have to say that "f" is a windows form twice? No more, just write something like this:

var f = new Form();

And the compiler will infer that "f" is a windows form just reading the code on the right part of the sentence. It´s important to mark that this has no performance impact, as it´s just a compiler feature. Each time you compile, the MSIL code generated will definately contain the declaration in the old way. It´s just a helper right there for you, just to be more productive. And of course it works with anything:

var a = 5;
var a = 5f;
var a = new Class1();
var a = "";

Great!

TechEd 2007. KeyNote by S. Somasegar

Yesterday, at 14:00 we attended the keynote of the TechEd2007, by Microsoft´s developer division corporate vice-president, Mr. S. Somasegar.


He presented the new key features of Microsoft developments plattform: VisualStudio 2008, .Net Framework 3.5, SilverLight, the Expression Studio tools, etc.


To summarize, he presented an important part of what we are going to see in deeper detail through this next days.

More later...

TechEd Barcelona. 2007


Tomorrow I´m traveling to Barcelona to attend the Microsoft TechEd Developers 2007. I´d be glad to meet you there if you also attend.
I´ll try to post session comments here too, at the end of each day.
Cheers!
-----
Mañana viajo a Barcelona para asistir al TechEd Developers 2007 que Microsoft organiza esta semana.
Estaré encantado de veros por allí si estáis, y también trataré de postear comentarios, impresiones o resúmenes de las sesiones a las que vaya asistiendo.
Saludos!


Great master of chess trying Simax

Several months ago, we had the pleasure to receive at our facilities to the great master of chess Miguel Illescas.

He was trying one of the first prototypes of the simax simulator. Although it was in a very primitive stage, he liked it and enjoyed a ride with a Volkswagen Polo.

I include this post now, because I´ve received this link with some info about it (Basque Language)

http://www.xake.net/6Gogoratzen/2007_EUS/2007-05-29%20Miguel%20Illescas,%20xakelaria%20eta%20informatikaria%20-Berria-n.htm

MSFT Madrid

Today, I had the chance to visit Microsoft facilities in Madrid. It´s a beautiful place as you can see:


Good to work here, specially after you see several XBox360 at the entrance ;)

Thank you guys!

Photoshop CS3 Layers. Select all pixels & rasterize effects

I´ve been messing around with Photoshop CS3 and I´ve found a couple of things I´d like to share with you.

In versions of PS prior to the CS2, only one layer in the layer palette could be selected at a time. Now, there´s the possibility to select more than one layer and work with them alltogether, in the typical ctrl+click way to select and de-select layers.

This is great, but that combination (ctrl+click) was previously used to select all layer´s visible pixels. So now, how is this thing done? Well, after 15 minutes trying, searching, and desperating, I´ve realized it´s the very same thing, but clicking in the layer´s thumbnail instead of any part of layers entrance.

Second trick I´ve found here:

http://graphicssoft.about.com/cs/photoshop/qt/flatlayereffect.htm

HOWTO flatten, or rasterize all layer´s effects:

If you have applied some effects to a layer, all of them keep editable at all the time. This is also great but if you need at some time to "apply" all that effects, rasterize them in the layer and reset all the effects properties, so you can work again with the modified layer "from scratch", there is no obvious option to do so.

A very easy way to do this, is to create an empty layer and place it just below the layer you want to flatten. Then merge that layer down (ctrl+E) to the empty layer you just created and voilá! all the effects get applied and disappeared.

Cheers!

Tutorial de desarrollo de Juegos: Diseño basado en componentes

No siempre voy a hacerlo, pero hoy me veo con fuerzas y voy a tratar de escribir este tutorial en ambos idiomas. Allá va...

Si habéis leído algo sobre XNA, probablemente hayáis visto un concepto que, aunque lleva ya bastantes años por ahí, su aplicación en el sector de los videojuegos es bastante nueva y especialmente apropiada. Estoy hablando del: Desarrollo basado en componentes.

La idea es diseñar todos los objetos del juego siguiendo un mismo interfaz:


// Inicialización del objeto, construcción de recursos, etc
void Initialize();

// Actualización: Incluye toda la lógica del juego necesaria para el objeto
void Update(double pAppTime, float pElapsedTime);

// Dibujado, en los casos que proceda
void Render(Device pGraphicsDevice);

Los parámetros de esos métodos pueden variar a gusto del consumidor. XNA o DX9 tienen sus parámetros típicos, pero tu usa aquellos con los que te sientas cómodo.

Lo importante de todo esta metodología es que mantiene una estructura de aplicación muy muy simple, fácil de comprender y de extender, ya que todos los objetos se comportan de la misma manera. Si lo piensas bien, practicamente nunca vas a necesitar nada fuera de esos tres métodos.

En los siguientes posts bajo este mismo TAG, iré incluyendo un tutorial que muestra el desarrollo de un juego muy sencillo, del estilo al arkanoid, que sigue este patrón o filosofía. Está basado en C# y GDI, y aunque no es nada complicado, sirve para mostrar este concepto.

Saludiños!

Game Development Tutorial: Component based design or more precisely, the Interface used in CBD

If you´ve read something about XNA, you have probably seen a concept that, though it´s out there for many years now, it´s quite new and specially appropiate for games: Component based programming.

Some people pointed out that I´m talking more about the interface used in the Component Based Design of XNA than the CBD itself, and they are right. Absolutely right.

The important idea I wanted to transmit here is the convenience of using game objects or components that share an interface like the following:

// Object initialization, boot up, etc
void Initialize();

// State update: Put your game logic in here
void Update(double pAppTime, float pElapsedTime);

// Draw method: draw the object if needed
void Render(Device pGraphicsDevice);

The important thing about this methodology is that it keeps a very simple application structure, and every component behaves in the very same way. If you think about it, most of the times you don´t need anything appart from those 3 methods.

In the following posts in this same tag, I´ll include a very simple arkanoid-like game application that follows this mothodology. It´s quite simple, C# and GDI based, but it performs pretty well and shows what I´m talking about.

Cheers!

Double Buffer Graphics in C# + GDI

Hi all,

recently, I was building a test application that needed some basic graphic drawing to show some physical values in real time. I wanted to do it simple and fast, so I didn´t want to deal with all the DirectX stuff (devices, resources, etc). That´s why I went into the simple Windows Forms GDI solution.

I wrote the program and run fine but, as expected, flickering appeared all around when animation came into scene. This is something that was obviously going to happen, so I decided to remember the old times and search for a double buffer drawing solution.

It is very simple to fix this behavior, just draw everything appart, to a different surface, and then dump the whole picture to the screen. Among the different solutions I found over the internet, one of the best and most simple is the code included below (NT Almond. 2003):

Just include it in a class and perform all the rendering through its Graphics object.

et voilá!


using System;
using System.Drawing;

namespace GDIDB
{
///


/// Class to implement Double Buffering
/// NT Almond
/// 24 July 2003
///

///
public class DBGraphics
{
private Graphics graphics;
private Bitmap memoryBitmap;
private int width;
private int height;

///
/// Default constructor
///

public DBGraphics()
{
width = 0;
height = 0;
}

///
/// Creates double buffer object
///

/// Window forms Graphics Object
/// width of paint area
/// height of paint area
/// true/false if double buffer is created
public bool CreateDoubleBuffer( Graphics g, int width, int height )
{
if ( width <= 0 height <= 0 ) return false; if ( width != this.width height != this.height memoryBitmap == null graphics == null ) { if ( memoryBitmap != null ) { memoryBitmap.Dispose(); memoryBitmap = null; } if ( graphics != null ) { graphics.Dispose(); graphics = null; } this.width = width; this.height = height; memoryBitmap = new Bitmap( width, height ); graphics = Graphics.FromImage( memoryBitmap ); } return true; } ///
/// Renders the double buffer to the screen
///

/// Window forms Graphics Object
public void Render( Graphics g )
{
if ( memoryBitmap != null )
g.DrawImage( memoryBitmap, new Rectangle( 0, 0, width, height ), 0, 0, width, height, GraphicsUnit.Pixel );
}

///
///
///

/// true if double buffering can be achieved
public bool CanDoubleBuffer()
{
return graphics != null;
}

///
/// Accessor for memory graphics object
///

public Graphics g
{
get
{
return graphics;
}
}
}
}

Code found here, among other sites:
http://www.koders.com/csharp/fid8D1742BF7E30AEB520A0548A95C99DD48CDAA645.aspx

Simax en Navarparty 2007

Muy buenas,

hace ya bastante tiempo que no escribo en el blog. Como dirían algunos... busy, busy, busy...

En fin, que este viernes estaré en la Navarparty (Pamplona), presentando el proyecto Simax y respondiendo a cualquier duda que salga. También habrá alguna demo del sistema, técnica, etc.

El horario provisional es 17:30 de la tarde. Si por algún motivo cambia, podréis verlo actualizado aqui:

http://www.navarparty.org/content/view/69/115/

Salu2!

Discover the Logitech G25

As you probably already know, the G25´s shifter is extremely functional as it can be configured as an h-pattern shifter or a sequential shifter.

What maybe you don´t know yet is that you can push the shifter down when h-pattern mode is selected. "Pushing down and setting a gear", will result in a different button than just "setting that gear".

This feature allows you to simulate, for example, a 6-gear car gearbox, configuring the reverse in the push-and-first_gear or push_and_sixth gear, just like in many real cars.

The G25 is fantastic !

Simax HiRes Videos

Muy buenas, estamos subiendo los videos del proyecto Simax al siguiente link:

http://stage6.divx.com/user/graphicdna/videos/group:uservideos

Stage6 soporta videos HD, así que hasta nuevo aviso, todos los futuros videos serán subidos allí.

Saludos

-----

Hi, we are uploading all the simax videos to:

http://stage6.divx.com/user/graphicdna/videos/group:uservideos

They are HD, so every new video will appear there too.

Cheers!

Simax Driving Simulator, Ejercicio formativo elemental

Muy buenas,

este post lo escribo en español porque el nuevo video de Simax también está en castellano, así que ná...

En el siguiente link:

http://www.youtube.com/watch?v=RObi53UJoDk

Tenéis el último video del proyecto simax, uno de los ejercicios formativos disponibles en el simulador, destinado a la práctica de las maniobras más básicas necesarias para el manejo de un turismo con transmisión manual, en este caso un Porsche 911... (no hubiera estado mal aprender a conducir con este coche, en lugar del Ibiza que tenían en mi autoescuela... ;)

Espero guste !

Un saludo,

Simax Porsche 911 Carrera S trailer

There´s a new Simax video available. You can find it here:

http://www.youtube.com/watch?v=q6VLp3Q4xdM

It shows some visual details of a Porsche 911 Carrera inside the engine of the Simax simulator. All scenes have been taken from live action in the simulator (no rendered scenes or post processing).

Hope you like it.

Cheers!

Microsoft CodeCamp. June 2007. El Rocío, Huelva

Hi there !

It´s been long ago since the last time I wrote a post. I´ve been really busy with the Simax project and the recent events. I haven´t visited the MSDN forums much neither, but I hope to start getting more time for my own since now.


This last weekend I had the chance to go to El Rocio (Huelva, Spain), where took place the Microsoft Codecamp. It´s a wonderful place with really good weather and food, and a must for any tourist visiting the south of Spain.

I personally enjoyed a lot my time there, and must thank Microsoft´s people (Jose, Alfonso, Beatriz, Maribel, Ethel, ...) for all the good work done there. It was GREAT !


We were accomodated in this wonderful bungalow camping:


and the agenda included lots of interesting sessions: http://www.microsoft.com/spanish/msdn/spain/eventos/codeagenda.mspx.


In the morning, I gave an introduction to XNA development, followed by a more technical XNA session by Javier Canton (http://www.codeplex.com/XNACommunity), who showed some very interesting visual effects, using XNA post-production shaders. Good work Javier!.


Later on, I presented the Simax Project and made a short demo showing the features of the driving simulator:


It would be too long to talk about every other session, but I must include a special mention to "El diván de Monica", really fun and instructive, in which Miguel Egea (http://blogs.solidq.com/ES/megea), Unai Zorrilla (http://geeks.ms/blogs/unai/) and Alejandro Mezcua (http://www.byteabyte.net/) were interviewed by Monica, and talked about their great experience in the industry, giving very good advices to all of us.


Of course, I cannot finish this post without talking about the last chart of the first day: "El rock ha muerto" (Rock is dead), by Chema Alonso (http://elladodelmal.blogspot.com/) and Ricardo Varela (http://phobeo.com). What can I say... Just take a look by yourself:


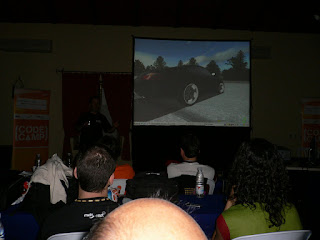
This has been, with no doubt, the funniest session I´ve ever seen. And was instructive too !!

Finally, I also have to thank Daniel Romano, Carlos Ibarra and Fernando Lacunza for their help with the shipment to the CodeCamp. It was hard, but you made it... Thanks !!


Thanks a lot to everyone !!!!!

Easy Drag&Drop from DataGridView control

The DataGridView control does not implement any method for doing Drag&Drop of items or rows out of it, but it can easily be done with some custom code. This first example will hande dragging of entire rows out of the DataGridView:

private void dataGridView1_MouseMove(object sender, MouseEventArgs e)
{
if (e.Button == MouseButtons.Left)
{
// If the datagrid has any selected row, and the mouse moves outside the datagridView,
// start the drag.
if (this.dataGridView1.SelectedRows.Count > 0 &&
!this.dataGridView1.ClientRectangle.Contains(e.X, e.Y))
{
// Proceed with the drag and drop, passing in the list of selected rows. You can
// assign any DragDropEffect you´d like here.
dataGridView1.DoDragDrop(dataGridView1.SelectedRows, DragDropEffects.Move);
}
}
}

This method determines that a dragging operation is being performed if the cursor gets out of the client rectangle of the grid, with the left button pressed (and any row selected).

It handles correctly a multi-select situation but it´s behavior is more "natural" if multiSelect is set to false, because while the cursor is inside the DataGrid, a drag will make the grid to select multiple rows. As soon as the cursor gets out the control, a Drag&Drop operation is started.

This is a verey simple and efficient way of handling this, but there are other possibilities.

Tipically, a windows application decides that a dragging operation is being performed if the mouse coursor travels (with the left button pressed) a certain distance, not necessarily out of the DataGridView like in the previous example. This minimum distance is a system configuration variable that can be found in: SystemInformation.DragSize.

Doing so is a more standard way and it also allows to drag and drop items inside the DataGridView. An easy way to handle this, is to keep track of a Rectangle defined at mouse down, with the dimensions of that DragSize. Some sample code:

private void dataGridView1_MouseDown(object sender, MouseEventArgs e)
{
// Get the index of the item the mouse is below.
DataGridView.HitTestInfo hInfo = this.dataGridView1.HitTest(e.X, e.Y);

// Will just handle if hitted a cell. You can test whatever kind of intersection you like here
if(hInfo.Type == DataGridViewHitTestType.Cell)
{
// The DragSize indicates the size that the mouse must move to consider a drag operation
Size dragSize = SystemInformation.DragSize;

// Create a rectangle using the DragSize, with the mouse position being
// at the center of the rectangle.
mMinDistanceRectangle = new Rectangle(
new Point(e.X - (dragSize.Width / 2), e.Y - (dragSize.Height / 2)), dragSize);
}
else
{
// Reset the rectangle if the mouse is not over an item in the ListBox.
mMinDistanceRectangle = Rectangle.Empty;
}
}

So, in the MouseMove event, you will want to test if the mouse is outside of that rectangle to start a Drag&Drop. Something like this:

if (mMinDistanceRectangle != Rectangle.Empty &&
!mMinDistanceRectangle .Contains(e.X, e.Y))
{
dataGridView1.DoDragDrop(...whatever...);
}

Hope this helps.

Cheers !

XNA Collision Detection (Part III). Content Processing (code fixed)

[Please NOTE: This article is OBSOLETE. It has been re-written and completed in this newer posts: part 1 and part 2]

Put in the Mesh class all the info wee need

Very much like we did in the Custom Content Processing post, we are going to use the “Tag” property of a mesh to store what we want, which in this case is something like this:


public class MeshData


{


public VertexPositionNormalTexture[] Vertices;


public int[] Indices;


public Vector3[] FaceNormals;


public MeshData(VertexPositionNormalTexture[] Vertices,


int[] Indices,


Vector3[] pFaceNormals)


{


this.Vertices = Vertices;


this.Indices = Indices;


this.FaceNormals = pFaceNormals;


}


}


When VisualStudio passes every model through our ContentProcessor, it will write the model´s data to an XNB file. When it finds a MeshData object, will search for a writer that is able to serialize it, so we have to write our custom ContentTypeWriter for the MeshData class:


[ContentTypeWriter]


public class ModelVertexDataWriter : ContentTypeWriter<MeshData>


{


protected override void Write(


ContentWriter output, MeshData value)


{


output.Write((int)value.Vertices.Length);


for (int x = 0; x < value.Vertices.Length; x++)


{


output.Write(value.Vertices[x].Position);


output.Write(value.Vertices[x].Normal);


output.Write(value.Vertices[x].TextureCoordinate);


}


output.Write(value.Indices.Length);


for (int x = 0; x < value.Indices.Length; x++)


output.Write(value.Indices[x]);


output.Write(value.FaceNormals.Length);


for (int x = 0; x < value.FaceNormals.Length; x++)


output.Write(value.FaceNormals[x]);


}


public override string GetRuntimeType(


TargetPlatform targetPlatform)


{


return typeof(MeshData).AssemblyQualifiedName;


}


public override string GetRuntimeReader(


TargetPlatform targetPlatform)


{


return "ContentProcessors.ModelVertexDataReader, ContentProcessors, Version=1.0.0.0, Culture=neutral";


}


}


In a similar way, when the ContentPipeline tries to read back the XNB file, it will search for a deserializer for the type MeshData, so we have to write our own ContentTypeReader:


public class ModelVertexDataReader : ContentTypeReader<MeshData>


{


protected override MeshData Read(


ContentReader input, MeshData existingInstance)


{


int i;


i = input.ReadInt32();


VertexPositionNormalTexture[] vb = new VertexPositionNormalTexture[i];


for (int x = 0; x < i; x++)


{


vb[x].Position = input.ReadVector3();


vb[x].Normal = input.ReadVector3();


vb[x].TextureCoordinate = input.ReadVector2();


}


i = input.ReadInt32();


int[] ib = new int[i];


for (int x = 0; x < i; x++)


ib[x] = input.ReadInt32();


i = input.ReadInt32();


Vector3[] normals = new Vector3[i];


for (int x = 0; x < i; x++)


normals[x] = input.ReadVector3();


return new MeshData(vb, ib, normals);


}


}


Finally, our Custom Content Processor that fills up the MeshData objects for each model goes through it:

Note: some parts taken from ZiggyWare:

http://www.ziggyware.com/readarticle.php?article_id=74


[ContentProcessor(DisplayName = "Custom Mesh Processor")]


public class PositionNormalTexture : ModelProcessor


{


public override ModelContent Process(


NodeContent input, ContentProcessorContext context)


{


ModelContent model = base.Process(input, context);


foreach (ModelMeshContent mesh in model.Meshes)


{


// Put the data in the tag.


VertexPositionNormalTexture[] vb;


MemoryStream ms =


new MemoryStream(mesh.VertexBuffer.VertexData);


BinaryReader reader = new BinaryReader(ms);


VertexElement[] elems = mesh.MeshParts[0].GetVertexDeclaration();


int num = mesh.VertexBuffer.VertexData.Length /


VertexDeclaration.GetVertexStrideSize(elems, 0);


vb = new VertexPositionNormalTexture[num];


for (int i = 0; i < num; i++)


{


foreach (VertexElement e in elems)


{


switch (e.VertexElementUsage)


{


case VertexElementUsage.Position:


{


vb[i].Position.X =


reader.ReadSingle();


vb[i].Position.Y =


reader.ReadSingle();


vb[i].Position.Z =


reader.ReadSingle();


}


break;


case VertexElementUsage.Normal:


{


vb[i].Normal.X =


reader.ReadSingle();


vb[i].Normal.Y =


reader.ReadSingle();


vb[i].Normal.Z =


reader.ReadSingle();


}


break;


case


VertexElementUsage.TextureCoordinate:


{


if (e.UsageIndex != 0)


continue;


vb[i].TextureCoordinate.X =


reader.ReadSingle();


vb[i].TextureCoordinate.Y =


reader.ReadSingle();


}


break;


default:


{


Console.WriteLine(e.VertexElementFormat.ToString());


switch (e.VertexElementFormat)


{


case VertexElementFormat.Color:


{


reader.ReadUInt32();


}


break;


case VertexElementFormat.Vector3:


{


reader.ReadSingle();


reader.ReadSingle();


reader.ReadSingle();


}


break;


case VertexElementFormat.Vector2:


{


reader.ReadSingle();


reader.ReadSingle();


}


break;


}


}


break;


}


}


} // for i < num


reader.Close();


int[] ib = new int[mesh.IndexBuffer.Count];


mesh.IndexBuffer.CopyTo(ib, 0);


Vector3[] normals = new Vector3[mesh.IndexBuffer.Count / 3];


for (int i = 0, conta = 0; i < mesh.IndexBuffer.Count; i += 3, conta++)


{


Vector3 v0 = vb[mesh.IndexBuffer[i]].Position;


Vector3 v1 = vb[mesh.IndexBuffer[i+1]].Position;


Vector3 v2 = vb[mesh.IndexBuffer[i+2]].Position;


Vector3 edge1 = v1 - v0;


Vector3 edge2 = v2 - v0;


Vector3 normal = Vector3.Cross(edge1, edge2);


normal.Normalize();


normals[conta] = normal;


}


mesh.Tag = new MeshData(vb, ib, normals);


} // foreach mesh


return model;


}


}


In the next chapter will focus on the Collision Detection implementation using all this info. Cheers !


XNA Collision Detection (Part II)

[Please NOTE: This article is OBSOLETE. It has been re-written and completed in this newer posts: part 1 and part 2]

Accurate collision detection

( I assume here that you´ve read my post about Custom Content Processing: http://graphicdna.blogspot.com/2007/02/xna-customizing-content-processing.html )

A more accurate collision model is sometimes needed. The best is to develop a library of methods to test between meshes and rays, spheres, boxes, etc. How we do that?

Probably, you already incluye in your engine a system memory copy of your geometry. The problem is that there´s no direct access to content created with the WriteOnly flag in XNA, so you cannot create that sysmem copy at load time.

The solution is to make a custom content processor that stores that copy of the geometry at build time, where there´s still access to it. We made a simple example of something similar in the post mentioned above, but now we need more...

In the next post, I´ll show how to create a Custom Content Processor designed to store all the info needed for collision detection.

Cheers !

XNA Collision Detection (Part I)

[Please NOTE: This article is OBSOLETE. It has been re-written and completed in this newer posts: part 1 and part 2]

Preface:

If you want to see an introductory post to Collision Detection, check out this one: http://graphicdna.blogspot.com/2007/02/3d-intersection-concepts-and.html


XNA collision detection

In D3D there´s a method called Mesh.Intersect that performs a Mesh-Ray intersection test. Many people thinks this method does some kind of optimized "magic" to test for intersection, but in fact it just loops throught all the triangles of the mesh doing a triangle-ray intersect, keeping track of the closest collision point. In XNA, there´s not such a method, and we will have to do it on our own. To do so, we will also have to deal with Custom Content Processing.

Simple Collision Detection

Before we go into a Mesh.Intersect() method, it´s a good idea to point out that XNA does include simple intersection tests for simplification shapes like: Bounding Spheres, AABB (Axis Aligned Bound Box), Planes, Rays, and any combination of them.

Using those tests, almost any kind of game-like intersection can be achieved. You must remember that a Mesh-Whatever intersection is expensive (depending in the number of polygons, of course), and should be left for special cases in which a very high intersection accuracy is needed. So, its usually preferred to aproximate a complex geometry by a bunch of spheres or boxes, than using the real triangles.

There´s a very good post at Sharky´s blog about XNA collisions, specially focused in approximating generic shapes with bounding spheres.

You can find it here: http://sharky.bluecog.co.nz/?p=119

Will continue tomorrow.

Cheers !

More ski

Another great ski day. Here, my dad, great skier (Candanchu, 2003). This man didn´t ski for eleven years before that day... Just after getting down the chair lift, he went down the hardest track of the resort, at full speed... After 200m, he crashed and started to tumble downhill. I was worried as he´s 56, but when I got where he was, he standed up to his knees, with a great smile in his face, all his moustache, clothes and hat full white with snow.... jaaa jaaaa.
Thanks dad !


3D intersection concepts and the Mesh.Intersect() method

[Please NOTE: This article is OBSOLETE. It has been re-written and completed in this newer posts: part 1 and part 2]

Today I´ve posted an answer to somebody that wanted to know more about collision detection and the use of the Mesh.Intersect method. As I liked the post, I decided to put it in here. Hope it helps somebody else. You can find the original post here:
http://forums.microsoft.com/MSDN/ShowPost.aspx?PostID=1197599&SiteID=1


Determining if any two 3D objects intersect and get useful information about the intersection is not a easy task. Specially if you want to do it fast.

The key to optimize this algorithms is quick discarding non colliding objects. To do so, a list of algorithms can be applied. The more usual are the BoundXXX discard tests:

- BoundSphere: Use a hipotetical sphere surrounding objects. If the distance between objects are bigger than the sum of both radius, then they don´t intersect. This fits well for objects similar to a sphere, but not at all for something like a hockey stick, for example. This one is supported in DirectX (BoundSphereTest)

- Axis Aligned Bound Box: Use a hipotetical box surrounding objects. This box is not aligned with the object, but with the world axis (it´s not rotated with the object). It just keeps track of the maximum and minimum values of X,Y,Z along the objects´s geometry. It´s also supported in DirectX (BoundBoxTest) and fits best with squared geometry, of course.

- Oriented Bound Box: This one is more accurate of the three, but of course more expensive to compute. It rotates the bounding box with the object, so it fits better it´s geometry. It´s not supported in DirectX and you´ll have to do it yourself. Let me know if you need help on this.

Once you are doing a good discard test of non-colliding objects, and once you got two objects that "may be intersecting", it´s time to go into a more detailed collision detection model.

There are dozens of intersection algorithms, each one optimized for the kind of geometry you want to test: Ray-Polygon, Ray-Mesh, Polygon-Mesh, Cylinder-Mesh, Cylinder-Ray, Sphere-Mesh, and so on...

The best is, if at least one of your two objects can be aproximated as a geometric shape like Sphere, Cylinder, Box, etc, because the Mesh-Mesh case is of course the most expensive. You can find very good resources about this algorithms here:

http://www.realtimerendering.com/int/

One of the most common methods is to define some BoundingSpheres that aproximate the real shape of an object, and use the sphere-mesh test. This method gives very good results sometimes (specially when objects are near to spherical) and it´s very fast.

Another usual method is to aproximate one of the two objects using a bunch of rays as collision testers and then perform the ray-mesh test. For example, if wanted to detect if a character is touching somethig, you can use rays describing it´s arms directions, and do a Ray-Mesh test against all other objects in the scene.

Thats where the Mesh.Intersect() methods comes in, because it performs the Mesh-Ray test. You can use it like this:

DX.Direct3D.IntersectInformation intersectionInfo;

if (mesh.Intersect(rayOrigin, rayDirection, out intersectionInfo))
{
// There is collision
}

The IntersectInformation structure gives you the exact Distance between the ray origin and the intersection point, the face index of the mesh with which the collision occurs, and the U,V coordinates of the intersection point (useful if you want to search something in the mesh texture, i.e. if the texture is transparent in that point).

If you want to know the exact 3D point of intersection you can easily calculate it like:

intersectionPoint = rayOrigin + (rayDirection * intersectInformation.Distance);

If you want the normal of the surface in the collision point, use the normal of the mesh´ face using the face index returned in IntersectInformation.

One thing you must be careful with: this method uses the current state of the mesh. It tests all of it´s polygons against the ray. If you move or rotate the mesh setting a transform matrix in the Device.Transforms.World, that transformation will not be taken into count in the Mesh.Intersect method. If your objects are dynamic, you should keep track of a mesh version with all it´s transformations applied to the vertices.

Lastly, if you want to do some serious collision detection, specially if you are planning to do any Rigid Body management, my suggestion would be to have a look to the SAT Algorithm (Separation Axes Algorithm). Its fast, accurate and gives you very useful information, like the MTD (minimum translation distance and direction to solve inter-penetration).

Cheers!

Windows vista disappointment

Just a couple of days ago, I took my hands onto the release version of Vista.

I have to say that I´ve been quite sceptic about installing vista, but finally I tried. In order to not interfering too much in my desktop computers, I tried to install it in my laptop (over a previous XP installation).

The installation process finished flawlessly. Slow, but flawless. After I booted for the first time, I realised that everything was very slow. And I mean veeeeeery slow.

In part, it is due to the hardware specs of my laptop: Pentium IV 2.8 Ghz, 512 Mb RAM, ATI Mobility Radeon 9700. I know that 512Mb are not enough at all for vista , but... man! So slow?May be the lack of performance is also due to the second problem I´ve found. The damn Code 43 error.

No matter what I try, but I cannot make the O.S. load the ATI card´s driver properly. Im trying with the new Catalyst 7.1 drivers. The install process works Ok, but after reboot the driver does not load properly and the card is not recognized.

Any help on this would be really appreciated !!!!

Cheers!

AJAX, XNA, WF, WCF, WPF, WTF does that mean?

Hi there!

last thursday took place here the event:

AJAX, XNA, WF, WCF, WPF, WTF does that mean?


Firstly, we had the chance to learn from David Salgado (http://blogs.msdn.com/davidsalgado/) in his charts about ASP.NET AJAX, WCF and WPF. Amazing !!!!


Thanks David!


Later on, I talked about Managed DirectX and XNA, including a demo about Simax project (http://www.simax.es). Hope you enjoyed it.


We also learned about WF from Carlos Segura (Sharepoint MVP, http://www.ideseg.com/). Excellent work too Carlos!


Thanks a lot to navarraDotNet too !