Tutorial de desarrollo de Juegos: Diseño basado en componentes

No siempre voy a hacerlo, pero hoy me veo con fuerzas y voy a tratar de escribir este tutorial en ambos idiomas. Allá va...

Si habéis leído algo sobre XNA, probablemente hayáis visto un concepto que, aunque lleva ya bastantes años por ahí, su aplicación en el sector de los videojuegos es bastante nueva y especialmente apropiada. Estoy hablando del: Desarrollo basado en componentes.

La idea es diseñar todos los objetos del juego siguiendo un mismo interfaz:


// Inicialización del objeto, construcción de recursos, etc
void Initialize();

// Actualización: Incluye toda la lógica del juego necesaria para el objeto
void Update(double pAppTime, float pElapsedTime);

// Dibujado, en los casos que proceda
void Render(Device pGraphicsDevice);

Los parámetros de esos métodos pueden variar a gusto del consumidor. XNA o DX9 tienen sus parámetros típicos, pero tu usa aquellos con los que te sientas cómodo.

Lo importante de todo esta metodología es que mantiene una estructura de aplicación muy muy simple, fácil de comprender y de extender, ya que todos los objetos se comportan de la misma manera. Si lo piensas bien, practicamente nunca vas a necesitar nada fuera de esos tres métodos.

En los siguientes posts bajo este mismo TAG, iré incluyendo un tutorial que muestra el desarrollo de un juego muy sencillo, del estilo al arkanoid, que sigue este patrón o filosofía. Está basado en C# y GDI, y aunque no es nada complicado, sirve para mostrar este concepto.

Saludiños!

Game Development Tutorial: Component based design or more precisely, the Interface used in CBD

If you´ve read something about XNA, you have probably seen a concept that, though it´s out there for many years now, it´s quite new and specially appropiate for games: Component based programming.

Some people pointed out that I´m talking more about the interface used in the Component Based Design of XNA than the CBD itself, and they are right. Absolutely right.

The important idea I wanted to transmit here is the convenience of using game objects or components that share an interface like the following:

// Object initialization, boot up, etc
void Initialize();

// State update: Put your game logic in here
void Update(double pAppTime, float pElapsedTime);

// Draw method: draw the object if needed
void Render(Device pGraphicsDevice);

The important thing about this methodology is that it keeps a very simple application structure, and every component behaves in the very same way. If you think about it, most of the times you don´t need anything appart from those 3 methods.

In the following posts in this same tag, I´ll include a very simple arkanoid-like game application that follows this mothodology. It´s quite simple, C# and GDI based, but it performs pretty well and shows what I´m talking about.

Cheers!

Double Buffer Graphics in C# + GDI

Hi all,

recently, I was building a test application that needed some basic graphic drawing to show some physical values in real time. I wanted to do it simple and fast, so I didn´t want to deal with all the DirectX stuff (devices, resources, etc). That´s why I went into the simple Windows Forms GDI solution.

I wrote the program and run fine but, as expected, flickering appeared all around when animation came into scene. This is something that was obviously going to happen, so I decided to remember the old times and search for a double buffer drawing solution.

It is very simple to fix this behavior, just draw everything appart, to a different surface, and then dump the whole picture to the screen. Among the different solutions I found over the internet, one of the best and most simple is the code included below (NT Almond. 2003):

Just include it in a class and perform all the rendering through its Graphics object.

et voilá!


using System;
using System.Drawing;

namespace GDIDB
{
///


/// Class to implement Double Buffering
/// NT Almond
/// 24 July 2003
///

///
public class DBGraphics
{
private Graphics graphics;
private Bitmap memoryBitmap;
private int width;
private int height;

///
/// Default constructor
///

public DBGraphics()
{
width = 0;
height = 0;
}

///
/// Creates double buffer object
///

/// Window forms Graphics Object
/// width of paint area
/// height of paint area
/// true/false if double buffer is created
public bool CreateDoubleBuffer( Graphics g, int width, int height )
{
if ( width <= 0 height <= 0 ) return false; if ( width != this.width height != this.height memoryBitmap == null graphics == null ) { if ( memoryBitmap != null ) { memoryBitmap.Dispose(); memoryBitmap = null; } if ( graphics != null ) { graphics.Dispose(); graphics = null; } this.width = width; this.height = height; memoryBitmap = new Bitmap( width, height ); graphics = Graphics.FromImage( memoryBitmap ); } return true; } ///
/// Renders the double buffer to the screen
///

/// Window forms Graphics Object
public void Render( Graphics g )
{
if ( memoryBitmap != null )
g.DrawImage( memoryBitmap, new Rectangle( 0, 0, width, height ), 0, 0, width, height, GraphicsUnit.Pixel );
}

///
///
///

/// true if double buffering can be achieved
public bool CanDoubleBuffer()
{
return graphics != null;
}

///
/// Accessor for memory graphics object
///

public Graphics g
{
get
{
return graphics;
}
}
}
}

Code found here, among other sites:
http://www.koders.com/csharp/fid8D1742BF7E30AEB520A0548A95C99DD48CDAA645.aspx

Simax en Navarparty 2007

Muy buenas,

hace ya bastante tiempo que no escribo en el blog. Como dirían algunos... busy, busy, busy...

En fin, que este viernes estaré en la Navarparty (Pamplona), presentando el proyecto Simax y respondiendo a cualquier duda que salga. También habrá alguna demo del sistema, técnica, etc.

El horario provisional es 17:30 de la tarde. Si por algún motivo cambia, podréis verlo actualizado aqui:

http://www.navarparty.org/content/view/69/115/

Salu2!

Discover the Logitech G25

As you probably already know, the G25´s shifter is extremely functional as it can be configured as an h-pattern shifter or a sequential shifter.

What maybe you don´t know yet is that you can push the shifter down when h-pattern mode is selected. "Pushing down and setting a gear", will result in a different button than just "setting that gear".

This feature allows you to simulate, for example, a 6-gear car gearbox, configuring the reverse in the push-and-first_gear or push_and_sixth gear, just like in many real cars.

The G25 is fantastic !

Simax HiRes Videos

Muy buenas, estamos subiendo los videos del proyecto Simax al siguiente link:

http://stage6.divx.com/user/graphicdna/videos/group:uservideos

Stage6 soporta videos HD, así que hasta nuevo aviso, todos los futuros videos serán subidos allí.

Saludos

-----

Hi, we are uploading all the simax videos to:

http://stage6.divx.com/user/graphicdna/videos/group:uservideos

They are HD, so every new video will appear there too.

Cheers!

Simax Driving Simulator, Ejercicio formativo elemental

Muy buenas,

este post lo escribo en español porque el nuevo video de Simax también está en castellano, así que ná...

En el siguiente link:

http://www.youtube.com/watch?v=RObi53UJoDk

Tenéis el último video del proyecto simax, uno de los ejercicios formativos disponibles en el simulador, destinado a la práctica de las maniobras más básicas necesarias para el manejo de un turismo con transmisión manual, en este caso un Porsche 911... (no hubiera estado mal aprender a conducir con este coche, en lugar del Ibiza que tenían en mi autoescuela... ;)

Espero guste !

Un saludo,

Simax Porsche 911 Carrera S trailer

There´s a new Simax video available. You can find it here:

http://www.youtube.com/watch?v=q6VLp3Q4xdM

It shows some visual details of a Porsche 911 Carrera inside the engine of the Simax simulator. All scenes have been taken from live action in the simulator (no rendered scenes or post processing).

Hope you like it.

Cheers!

Microsoft CodeCamp. June 2007. El Rocío, Huelva

Hi there !

It´s been long ago since the last time I wrote a post. I´ve been really busy with the Simax project and the recent events. I haven´t visited the MSDN forums much neither, but I hope to start getting more time for my own since now.


This last weekend I had the chance to go to El Rocio (Huelva, Spain), where took place the Microsoft Codecamp. It´s a wonderful place with really good weather and food, and a must for any tourist visiting the south of Spain.

I personally enjoyed a lot my time there, and must thank Microsoft´s people (Jose, Alfonso, Beatriz, Maribel, Ethel, ...) for all the good work done there. It was GREAT !


We were accomodated in this wonderful bungalow camping:


and the agenda included lots of interesting sessions: http://www.microsoft.com/spanish/msdn/spain/eventos/codeagenda.mspx.


In the morning, I gave an introduction to XNA development, followed by a more technical XNA session by Javier Canton (http://www.codeplex.com/XNACommunity), who showed some very interesting visual effects, using XNA post-production shaders. Good work Javier!.


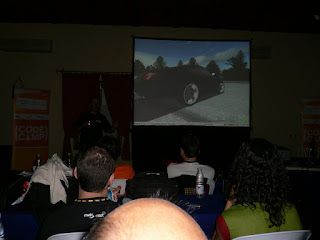
Later on, I presented the Simax Project and made a short demo showing the features of the driving simulator:


It would be too long to talk about every other session, but I must include a special mention to "El diván de Monica", really fun and instructive, in which Miguel Egea (http://blogs.solidq.com/ES/megea), Unai Zorrilla (http://geeks.ms/blogs/unai/) and Alejandro Mezcua (http://www.byteabyte.net/) were interviewed by Monica, and talked about their great experience in the industry, giving very good advices to all of us.


Of course, I cannot finish this post without talking about the last chart of the first day: "El rock ha muerto" (Rock is dead), by Chema Alonso (http://elladodelmal.blogspot.com/) and Ricardo Varela (http://phobeo.com). What can I say... Just take a look by yourself:


This has been, with no doubt, the funniest session I´ve ever seen. And was instructive too !!

Finally, I also have to thank Daniel Romano, Carlos Ibarra and Fernando Lacunza for their help with the shipment to the CodeCamp. It was hard, but you made it... Thanks !!


Thanks a lot to everyone !!!!!

Easy Drag&Drop from DataGridView control

The DataGridView control does not implement any method for doing Drag&Drop of items or rows out of it, but it can easily be done with some custom code. This first example will hande dragging of entire rows out of the DataGridView:

private void dataGridView1_MouseMove(object sender, MouseEventArgs e)
{
if (e.Button == MouseButtons.Left)
{
// If the datagrid has any selected row, and the mouse moves outside the datagridView,
// start the drag.
if (this.dataGridView1.SelectedRows.Count > 0 &&
!this.dataGridView1.ClientRectangle.Contains(e.X, e.Y))
{
// Proceed with the drag and drop, passing in the list of selected rows. You can
// assign any DragDropEffect you´d like here.
dataGridView1.DoDragDrop(dataGridView1.SelectedRows, DragDropEffects.Move);
}
}
}

This method determines that a dragging operation is being performed if the cursor gets out of the client rectangle of the grid, with the left button pressed (and any row selected).

It handles correctly a multi-select situation but it´s behavior is more "natural" if multiSelect is set to false, because while the cursor is inside the DataGrid, a drag will make the grid to select multiple rows. As soon as the cursor gets out the control, a Drag&Drop operation is started.

This is a verey simple and efficient way of handling this, but there are other possibilities.

Tipically, a windows application decides that a dragging operation is being performed if the mouse coursor travels (with the left button pressed) a certain distance, not necessarily out of the DataGridView like in the previous example. This minimum distance is a system configuration variable that can be found in: SystemInformation.DragSize.

Doing so is a more standard way and it also allows to drag and drop items inside the DataGridView. An easy way to handle this, is to keep track of a Rectangle defined at mouse down, with the dimensions of that DragSize. Some sample code:

private void dataGridView1_MouseDown(object sender, MouseEventArgs e)
{
// Get the index of the item the mouse is below.
DataGridView.HitTestInfo hInfo = this.dataGridView1.HitTest(e.X, e.Y);

// Will just handle if hitted a cell. You can test whatever kind of intersection you like here
if(hInfo.Type == DataGridViewHitTestType.Cell)
{
// The DragSize indicates the size that the mouse must move to consider a drag operation
Size dragSize = SystemInformation.DragSize;

// Create a rectangle using the DragSize, with the mouse position being
// at the center of the rectangle.
mMinDistanceRectangle = new Rectangle(
new Point(e.X - (dragSize.Width / 2), e.Y - (dragSize.Height / 2)), dragSize);
}
else
{
// Reset the rectangle if the mouse is not over an item in the ListBox.
mMinDistanceRectangle = Rectangle.Empty;
}
}

So, in the MouseMove event, you will want to test if the mouse is outside of that rectangle to start a Drag&Drop. Something like this:

if (mMinDistanceRectangle != Rectangle.Empty &&
!mMinDistanceRectangle .Contains(e.X, e.Y))
{
dataGridView1.DoDragDrop(...whatever...);
}

Hope this helps.

Cheers !