Simax Driving Simulator, Ejercicio formativo elemental

Muy buenas,

este post lo escribo en español porque el nuevo video de Simax también está en castellano, así que ná...

En el siguiente link:

http://www.youtube.com/watch?v=RObi53UJoDk

Tenéis el último video del proyecto simax, uno de los ejercicios formativos disponibles en el simulador, destinado a la práctica de las maniobras más básicas necesarias para el manejo de un turismo con transmisión manual, en este caso un Porsche 911... (no hubiera estado mal aprender a conducir con este coche, en lugar del Ibiza que tenían en mi autoescuela... ;)

Espero guste !

Un saludo,

Simax Porsche 911 Carrera S trailer

There´s a new Simax video available. You can find it here:

http://www.youtube.com/watch?v=q6VLp3Q4xdM

It shows some visual details of a Porsche 911 Carrera inside the engine of the Simax simulator. All scenes have been taken from live action in the simulator (no rendered scenes or post processing).

Hope you like it.

Cheers!

Microsoft CodeCamp. June 2007. El Rocío, Huelva

Hi there !

It´s been long ago since the last time I wrote a post. I´ve been really busy with the Simax project and the recent events. I haven´t visited the MSDN forums much neither, but I hope to start getting more time for my own since now.


This last weekend I had the chance to go to El Rocio (Huelva, Spain), where took place the Microsoft Codecamp. It´s a wonderful place with really good weather and food, and a must for any tourist visiting the south of Spain.

I personally enjoyed a lot my time there, and must thank Microsoft´s people (Jose, Alfonso, Beatriz, Maribel, Ethel, ...) for all the good work done there. It was GREAT !


We were accomodated in this wonderful bungalow camping:


and the agenda included lots of interesting sessions: http://www.microsoft.com/spanish/msdn/spain/eventos/codeagenda.mspx.


In the morning, I gave an introduction to XNA development, followed by a more technical XNA session by Javier Canton (http://www.codeplex.com/XNACommunity), who showed some very interesting visual effects, using XNA post-production shaders. Good work Javier!.


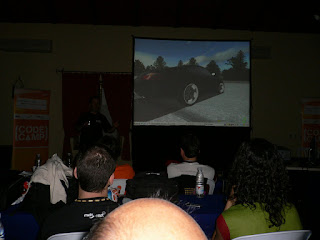
Later on, I presented the Simax Project and made a short demo showing the features of the driving simulator:


It would be too long to talk about every other session, but I must include a special mention to "El diván de Monica", really fun and instructive, in which Miguel Egea (http://blogs.solidq.com/ES/megea), Unai Zorrilla (http://geeks.ms/blogs/unai/) and Alejandro Mezcua (http://www.byteabyte.net/) were interviewed by Monica, and talked about their great experience in the industry, giving very good advices to all of us.


Of course, I cannot finish this post without talking about the last chart of the first day: "El rock ha muerto" (Rock is dead), by Chema Alonso (http://elladodelmal.blogspot.com/) and Ricardo Varela (http://phobeo.com). What can I say... Just take a look by yourself:


This has been, with no doubt, the funniest session I´ve ever seen. And was instructive too !!

Finally, I also have to thank Daniel Romano, Carlos Ibarra and Fernando Lacunza for their help with the shipment to the CodeCamp. It was hard, but you made it... Thanks !!


Thanks a lot to everyone !!!!!

Easy Drag&Drop from DataGridView control

The DataGridView control does not implement any method for doing Drag&Drop of items or rows out of it, but it can easily be done with some custom code. This first example will hande dragging of entire rows out of the DataGridView:

private void dataGridView1_MouseMove(object sender, MouseEventArgs e)
{
if (e.Button == MouseButtons.Left)
{
// If the datagrid has any selected row, and the mouse moves outside the datagridView,
// start the drag.
if (this.dataGridView1.SelectedRows.Count > 0 &&
!this.dataGridView1.ClientRectangle.Contains(e.X, e.Y))
{
// Proceed with the drag and drop, passing in the list of selected rows. You can
// assign any DragDropEffect you´d like here.
dataGridView1.DoDragDrop(dataGridView1.SelectedRows, DragDropEffects.Move);
}
}
}

This method determines that a dragging operation is being performed if the cursor gets out of the client rectangle of the grid, with the left button pressed (and any row selected).

It handles correctly a multi-select situation but it´s behavior is more "natural" if multiSelect is set to false, because while the cursor is inside the DataGrid, a drag will make the grid to select multiple rows. As soon as the cursor gets out the control, a Drag&Drop operation is started.

This is a verey simple and efficient way of handling this, but there are other possibilities.

Tipically, a windows application decides that a dragging operation is being performed if the mouse coursor travels (with the left button pressed) a certain distance, not necessarily out of the DataGridView like in the previous example. This minimum distance is a system configuration variable that can be found in: SystemInformation.DragSize.

Doing so is a more standard way and it also allows to drag and drop items inside the DataGridView. An easy way to handle this, is to keep track of a Rectangle defined at mouse down, with the dimensions of that DragSize. Some sample code:

private void dataGridView1_MouseDown(object sender, MouseEventArgs e)
{
// Get the index of the item the mouse is below.
DataGridView.HitTestInfo hInfo = this.dataGridView1.HitTest(e.X, e.Y);

// Will just handle if hitted a cell. You can test whatever kind of intersection you like here
if(hInfo.Type == DataGridViewHitTestType.Cell)
{
// The DragSize indicates the size that the mouse must move to consider a drag operation
Size dragSize = SystemInformation.DragSize;

// Create a rectangle using the DragSize, with the mouse position being
// at the center of the rectangle.
mMinDistanceRectangle = new Rectangle(
new Point(e.X - (dragSize.Width / 2), e.Y - (dragSize.Height / 2)), dragSize);
}
else
{
// Reset the rectangle if the mouse is not over an item in the ListBox.
mMinDistanceRectangle = Rectangle.Empty;
}
}

So, in the MouseMove event, you will want to test if the mouse is outside of that rectangle to start a Drag&Drop. Something like this:

if (mMinDistanceRectangle != Rectangle.Empty &&
!mMinDistanceRectangle .Contains(e.X, e.Y))
{
dataGridView1.DoDragDrop(...whatever...);
}

Hope this helps.

Cheers !

XNA Collision Detection (Part III). Content Processing (code fixed)

[Please NOTE: This article is OBSOLETE. It has been re-written and completed in this newer posts: part 1 and part 2]

Put in the Mesh class all the info wee need

Very much like we did in the Custom Content Processing post, we are going to use the “Tag” property of a mesh to store what we want, which in this case is something like this:


public class MeshData


{


public VertexPositionNormalTexture[] Vertices;


public int[] Indices;


public Vector3[] FaceNormals;


public MeshData(VertexPositionNormalTexture[] Vertices,


int[] Indices,


Vector3[] pFaceNormals)


{


this.Vertices = Vertices;


this.Indices = Indices;


this.FaceNormals = pFaceNormals;


}


}


When VisualStudio passes every model through our ContentProcessor, it will write the model´s data to an XNB file. When it finds a MeshData object, will search for a writer that is able to serialize it, so we have to write our custom ContentTypeWriter for the MeshData class:


[ContentTypeWriter]


public class ModelVertexDataWriter : ContentTypeWriter<MeshData>


{


protected override void Write(


ContentWriter output, MeshData value)


{


output.Write((int)value.Vertices.Length);


for (int x = 0; x < value.Vertices.Length; x++)


{


output.Write(value.Vertices[x].Position);


output.Write(value.Vertices[x].Normal);


output.Write(value.Vertices[x].TextureCoordinate);


}


output.Write(value.Indices.Length);


for (int x = 0; x < value.Indices.Length; x++)


output.Write(value.Indices[x]);


output.Write(value.FaceNormals.Length);


for (int x = 0; x < value.FaceNormals.Length; x++)


output.Write(value.FaceNormals[x]);


}


public override string GetRuntimeType(


TargetPlatform targetPlatform)


{


return typeof(MeshData).AssemblyQualifiedName;


}


public override string GetRuntimeReader(


TargetPlatform targetPlatform)


{


return "ContentProcessors.ModelVertexDataReader, ContentProcessors, Version=1.0.0.0, Culture=neutral";


}


}


In a similar way, when the ContentPipeline tries to read back the XNB file, it will search for a deserializer for the type MeshData, so we have to write our own ContentTypeReader:


public class ModelVertexDataReader : ContentTypeReader<MeshData>


{


protected override MeshData Read(


ContentReader input, MeshData existingInstance)


{


int i;


i = input.ReadInt32();


VertexPositionNormalTexture[] vb = new VertexPositionNormalTexture[i];


for (int x = 0; x < i; x++)


{


vb[x].Position = input.ReadVector3();


vb[x].Normal = input.ReadVector3();


vb[x].TextureCoordinate = input.ReadVector2();


}


i = input.ReadInt32();


int[] ib = new int[i];


for (int x = 0; x < i; x++)


ib[x] = input.ReadInt32();


i = input.ReadInt32();


Vector3[] normals = new Vector3[i];


for (int x = 0; x < i; x++)


normals[x] = input.ReadVector3();


return new MeshData(vb, ib, normals);


}


}


Finally, our Custom Content Processor that fills up the MeshData objects for each model goes through it:

Note: some parts taken from ZiggyWare:

http://www.ziggyware.com/readarticle.php?article_id=74


[ContentProcessor(DisplayName = "Custom Mesh Processor")]


public class PositionNormalTexture : ModelProcessor


{


public override ModelContent Process(


NodeContent input, ContentProcessorContext context)


{


ModelContent model = base.Process(input, context);


foreach (ModelMeshContent mesh in model.Meshes)


{


// Put the data in the tag.


VertexPositionNormalTexture[] vb;


MemoryStream ms =


new MemoryStream(mesh.VertexBuffer.VertexData);


BinaryReader reader = new BinaryReader(ms);


VertexElement[] elems = mesh.MeshParts[0].GetVertexDeclaration();


int num = mesh.VertexBuffer.VertexData.Length /


VertexDeclaration.GetVertexStrideSize(elems, 0);


vb = new VertexPositionNormalTexture[num];


for (int i = 0; i < num; i++)


{


foreach (VertexElement e in elems)


{


switch (e.VertexElementUsage)


{


case VertexElementUsage.Position:


{


vb[i].Position.X =


reader.ReadSingle();


vb[i].Position.Y =


reader.ReadSingle();


vb[i].Position.Z =


reader.ReadSingle();


}


break;


case VertexElementUsage.Normal:


{


vb[i].Normal.X =


reader.ReadSingle();


vb[i].Normal.Y =


reader.ReadSingle();


vb[i].Normal.Z =


reader.ReadSingle();


}


break;


case


VertexElementUsage.TextureCoordinate:


{


if (e.UsageIndex != 0)


continue;


vb[i].TextureCoordinate.X =


reader.ReadSingle();


vb[i].TextureCoordinate.Y =


reader.ReadSingle();


}


break;


default:


{


Console.WriteLine(e.VertexElementFormat.ToString());


switch (e.VertexElementFormat)


{


case VertexElementFormat.Color:


{


reader.ReadUInt32();


}


break;


case VertexElementFormat.Vector3:


{


reader.ReadSingle();


reader.ReadSingle();


reader.ReadSingle();


}


break;


case VertexElementFormat.Vector2:


{


reader.ReadSingle();


reader.ReadSingle();


}


break;


}


}


break;


}


}


} // for i < num


reader.Close();


int[] ib = new int[mesh.IndexBuffer.Count];


mesh.IndexBuffer.CopyTo(ib, 0);


Vector3[] normals = new Vector3[mesh.IndexBuffer.Count / 3];


for (int i = 0, conta = 0; i < mesh.IndexBuffer.Count; i += 3, conta++)


{


Vector3 v0 = vb[mesh.IndexBuffer[i]].Position;


Vector3 v1 = vb[mesh.IndexBuffer[i+1]].Position;


Vector3 v2 = vb[mesh.IndexBuffer[i+2]].Position;


Vector3 edge1 = v1 - v0;


Vector3 edge2 = v2 - v0;


Vector3 normal = Vector3.Cross(edge1, edge2);


normal.Normalize();


normals[conta] = normal;


}


mesh.Tag = new MeshData(vb, ib, normals);


} // foreach mesh


return model;


}


}


In the next chapter will focus on the Collision Detection implementation using all this info. Cheers !


XNA Collision Detection (Part II)

[Please NOTE: This article is OBSOLETE. It has been re-written and completed in this newer posts: part 1 and part 2]

Accurate collision detection

( I assume here that you´ve read my post about Custom Content Processing: http://graphicdna.blogspot.com/2007/02/xna-customizing-content-processing.html )

A more accurate collision model is sometimes needed. The best is to develop a library of methods to test between meshes and rays, spheres, boxes, etc. How we do that?

Probably, you already incluye in your engine a system memory copy of your geometry. The problem is that there´s no direct access to content created with the WriteOnly flag in XNA, so you cannot create that sysmem copy at load time.

The solution is to make a custom content processor that stores that copy of the geometry at build time, where there´s still access to it. We made a simple example of something similar in the post mentioned above, but now we need more...

In the next post, I´ll show how to create a Custom Content Processor designed to store all the info needed for collision detection.

Cheers !

XNA Collision Detection (Part I)

[Please NOTE: This article is OBSOLETE. It has been re-written and completed in this newer posts: part 1 and part 2]

Preface:

If you want to see an introductory post to Collision Detection, check out this one: http://graphicdna.blogspot.com/2007/02/3d-intersection-concepts-and.html


XNA collision detection

In D3D there´s a method called Mesh.Intersect that performs a Mesh-Ray intersection test. Many people thinks this method does some kind of optimized "magic" to test for intersection, but in fact it just loops throught all the triangles of the mesh doing a triangle-ray intersect, keeping track of the closest collision point. In XNA, there´s not such a method, and we will have to do it on our own. To do so, we will also have to deal with Custom Content Processing.

Simple Collision Detection

Before we go into a Mesh.Intersect() method, it´s a good idea to point out that XNA does include simple intersection tests for simplification shapes like: Bounding Spheres, AABB (Axis Aligned Bound Box), Planes, Rays, and any combination of them.

Using those tests, almost any kind of game-like intersection can be achieved. You must remember that a Mesh-Whatever intersection is expensive (depending in the number of polygons, of course), and should be left for special cases in which a very high intersection accuracy is needed. So, its usually preferred to aproximate a complex geometry by a bunch of spheres or boxes, than using the real triangles.

There´s a very good post at Sharky´s blog about XNA collisions, specially focused in approximating generic shapes with bounding spheres.

You can find it here: http://sharky.bluecog.co.nz/?p=119

Will continue tomorrow.

Cheers !

More ski

Another great ski day. Here, my dad, great skier (Candanchu, 2003). This man didn´t ski for eleven years before that day... Just after getting down the chair lift, he went down the hardest track of the resort, at full speed... After 200m, he crashed and started to tumble downhill. I was worried as he´s 56, but when I got where he was, he standed up to his knees, with a great smile in his face, all his moustache, clothes and hat full white with snow.... jaaa jaaaa.
Thanks dad !


3D intersection concepts and the Mesh.Intersect() method

[Please NOTE: This article is OBSOLETE. It has been re-written and completed in this newer posts: part 1 and part 2]

Today I´ve posted an answer to somebody that wanted to know more about collision detection and the use of the Mesh.Intersect method. As I liked the post, I decided to put it in here. Hope it helps somebody else. You can find the original post here:
http://forums.microsoft.com/MSDN/ShowPost.aspx?PostID=1197599&SiteID=1


Determining if any two 3D objects intersect and get useful information about the intersection is not a easy task. Specially if you want to do it fast.

The key to optimize this algorithms is quick discarding non colliding objects. To do so, a list of algorithms can be applied. The more usual are the BoundXXX discard tests:

- BoundSphere: Use a hipotetical sphere surrounding objects. If the distance between objects are bigger than the sum of both radius, then they don´t intersect. This fits well for objects similar to a sphere, but not at all for something like a hockey stick, for example. This one is supported in DirectX (BoundSphereTest)

- Axis Aligned Bound Box: Use a hipotetical box surrounding objects. This box is not aligned with the object, but with the world axis (it´s not rotated with the object). It just keeps track of the maximum and minimum values of X,Y,Z along the objects´s geometry. It´s also supported in DirectX (BoundBoxTest) and fits best with squared geometry, of course.

- Oriented Bound Box: This one is more accurate of the three, but of course more expensive to compute. It rotates the bounding box with the object, so it fits better it´s geometry. It´s not supported in DirectX and you´ll have to do it yourself. Let me know if you need help on this.

Once you are doing a good discard test of non-colliding objects, and once you got two objects that "may be intersecting", it´s time to go into a more detailed collision detection model.

There are dozens of intersection algorithms, each one optimized for the kind of geometry you want to test: Ray-Polygon, Ray-Mesh, Polygon-Mesh, Cylinder-Mesh, Cylinder-Ray, Sphere-Mesh, and so on...

The best is, if at least one of your two objects can be aproximated as a geometric shape like Sphere, Cylinder, Box, etc, because the Mesh-Mesh case is of course the most expensive. You can find very good resources about this algorithms here:

http://www.realtimerendering.com/int/

One of the most common methods is to define some BoundingSpheres that aproximate the real shape of an object, and use the sphere-mesh test. This method gives very good results sometimes (specially when objects are near to spherical) and it´s very fast.

Another usual method is to aproximate one of the two objects using a bunch of rays as collision testers and then perform the ray-mesh test. For example, if wanted to detect if a character is touching somethig, you can use rays describing it´s arms directions, and do a Ray-Mesh test against all other objects in the scene.

Thats where the Mesh.Intersect() methods comes in, because it performs the Mesh-Ray test. You can use it like this:

DX.Direct3D.IntersectInformation intersectionInfo;

if (mesh.Intersect(rayOrigin, rayDirection, out intersectionInfo))
{
// There is collision
}

The IntersectInformation structure gives you the exact Distance between the ray origin and the intersection point, the face index of the mesh with which the collision occurs, and the U,V coordinates of the intersection point (useful if you want to search something in the mesh texture, i.e. if the texture is transparent in that point).

If you want to know the exact 3D point of intersection you can easily calculate it like:

intersectionPoint = rayOrigin + (rayDirection * intersectInformation.Distance);

If you want the normal of the surface in the collision point, use the normal of the mesh´ face using the face index returned in IntersectInformation.

One thing you must be careful with: this method uses the current state of the mesh. It tests all of it´s polygons against the ray. If you move or rotate the mesh setting a transform matrix in the Device.Transforms.World, that transformation will not be taken into count in the Mesh.Intersect method. If your objects are dynamic, you should keep track of a mesh version with all it´s transformations applied to the vertices.

Lastly, if you want to do some serious collision detection, specially if you are planning to do any Rigid Body management, my suggestion would be to have a look to the SAT Algorithm (Separation Axes Algorithm). Its fast, accurate and gives you very useful information, like the MTD (minimum translation distance and direction to solve inter-penetration).

Cheers!